Users Management
This page explains how to manage users, groups, and API tokens in SyncNow to maintain a secure and well-organized environment.
➕ Creating a User
To create a new user in SyncNow:
-
Navigate to the Users Page
From the main menu, select Users to access the user management interface.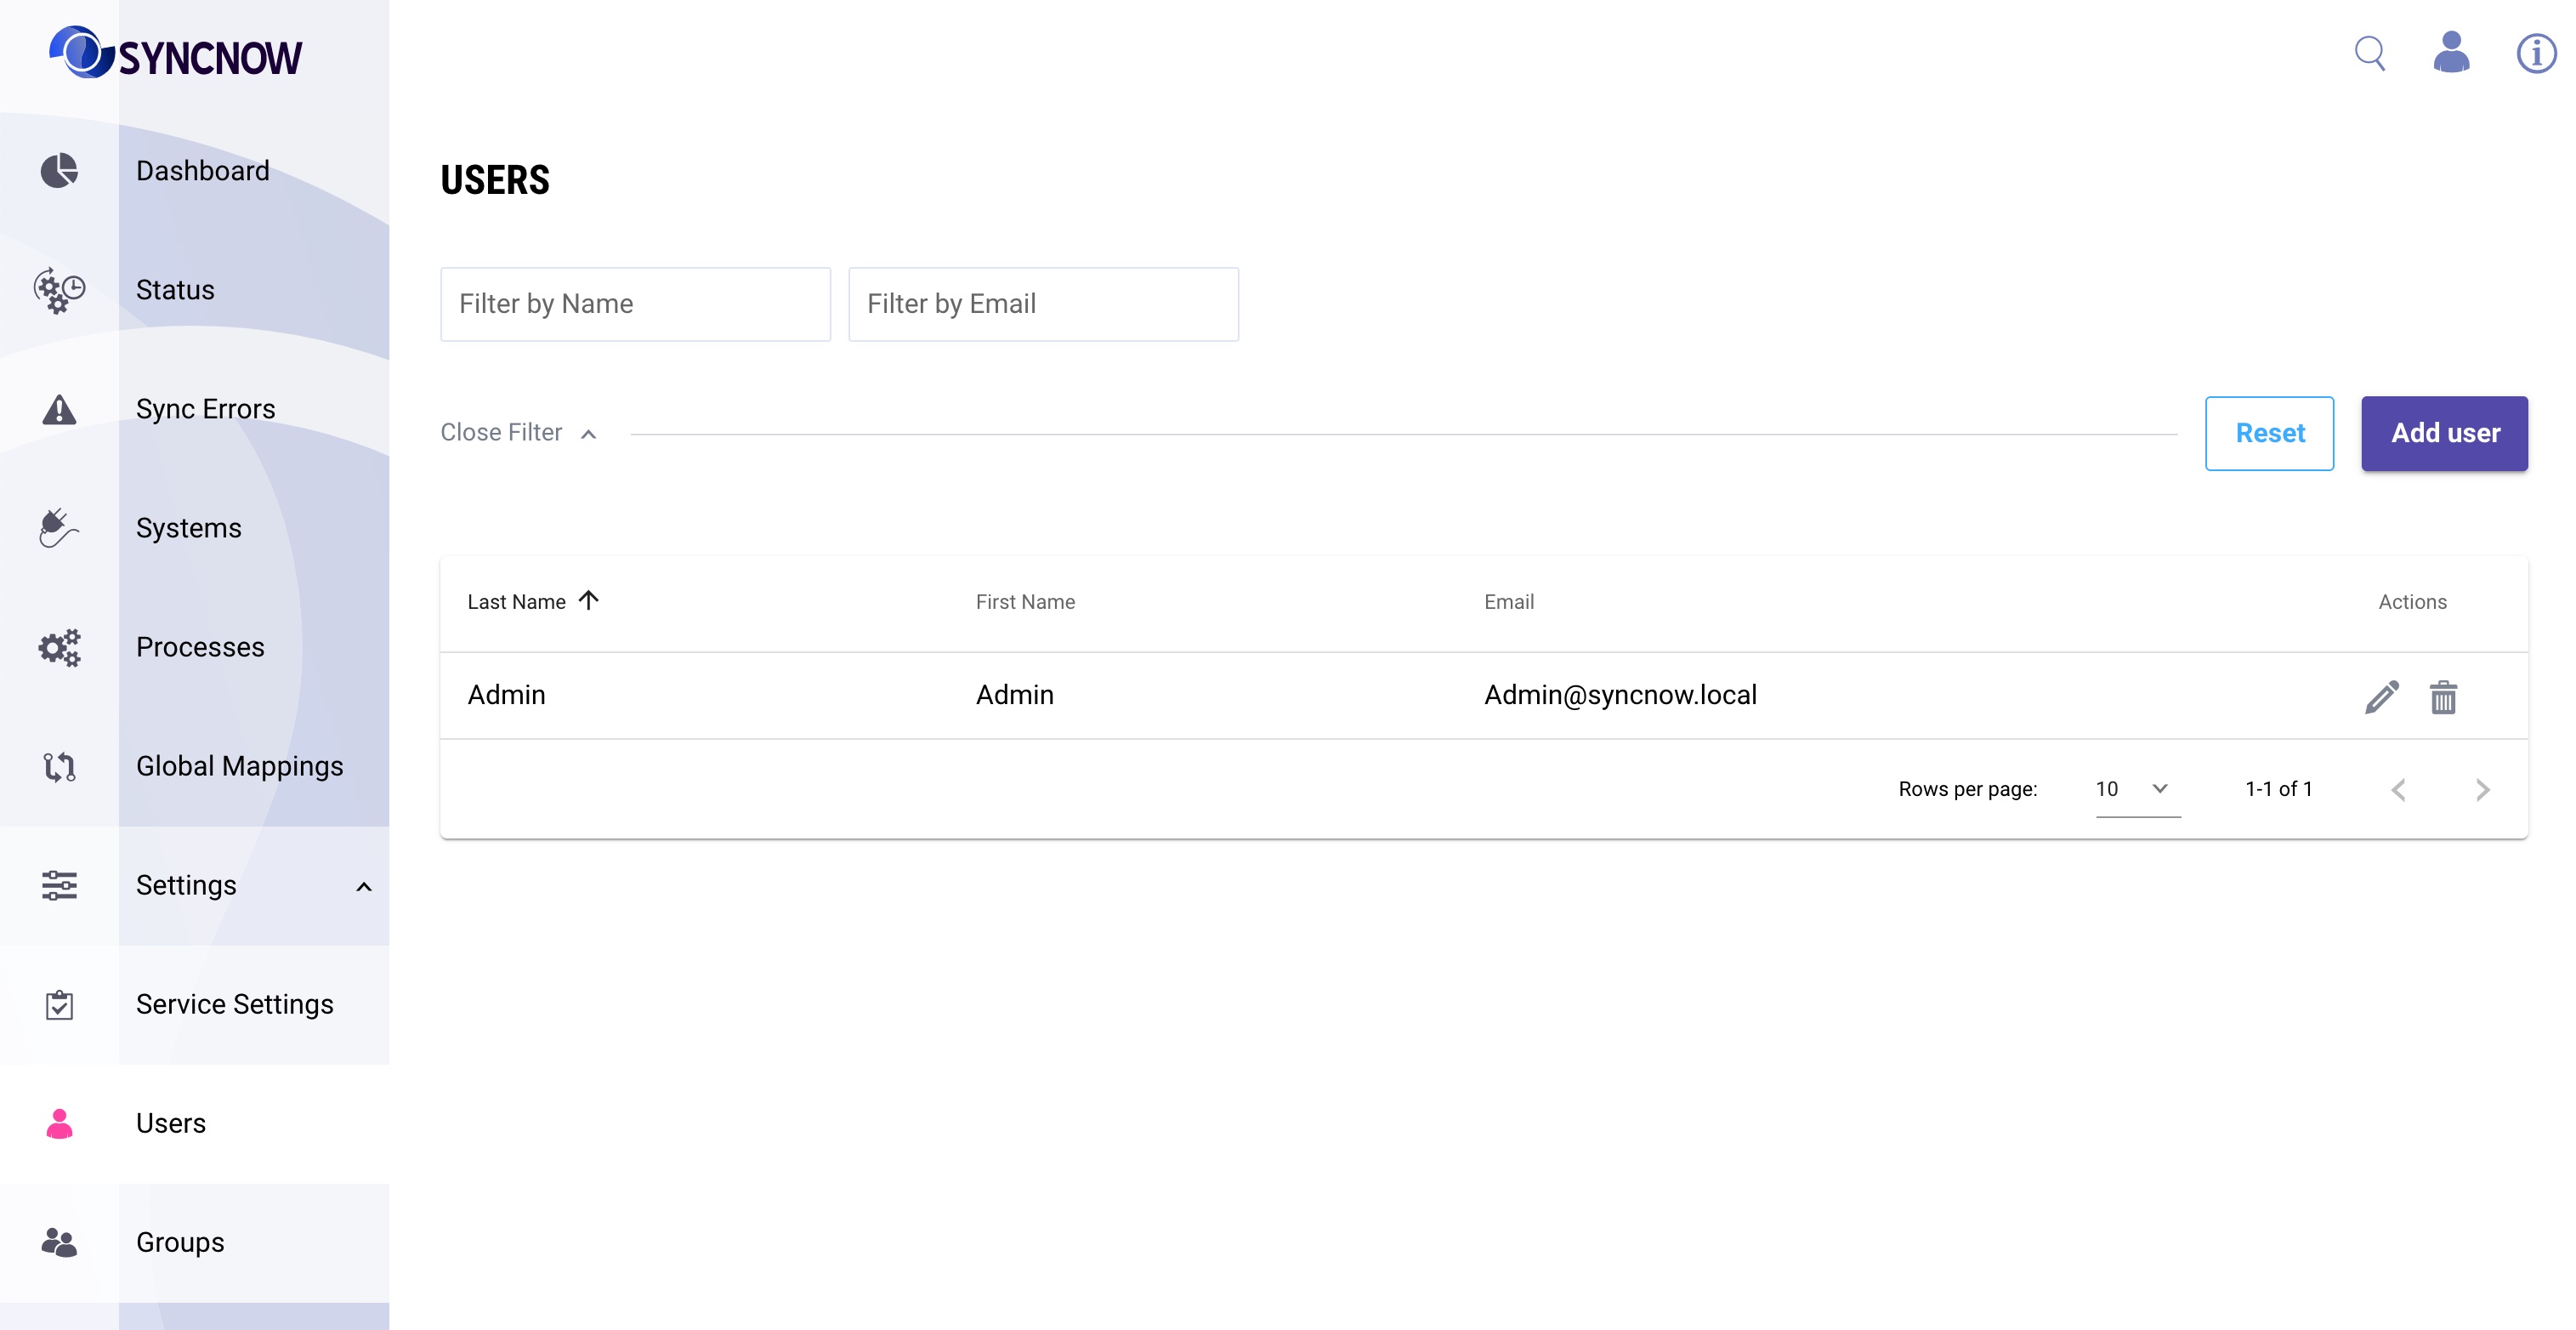
-
Press the Add User Button
Click the Add User button to start creating a new user. -
Input Required Information
Fill in the necessary details:- Username: Unique identifier for the user.
- Email Address: For communication and password recovery.
- First Name and Last Name
- Role: Assign a role to determine access level and permissions.
-
Create the User
Click Save to create the new user account. The user will now appear in the users list.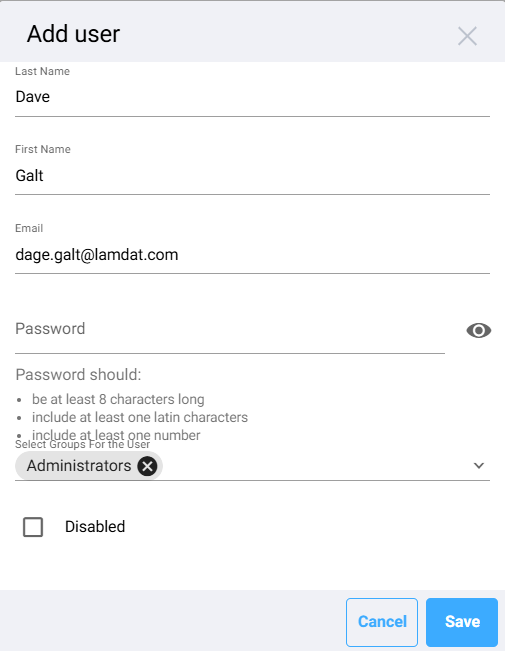
🔑 Resetting a User Password
Only SyncNow Admins can reset user passwords:
- Go to the Users section.
- Click the Reset Password button next to the user.
- Fill out the reset form:
- New Password
- Confirm New Password
- Click Submit to finalize.
🔒 Account Lockout
SyncNow uses account lockout to protect against unauthorized access:
- Lockout Trigger: After a set number of failed sign-in attempts, a non-admin account is locked.
- Unlocking Accounts:
- Users with the Configuration Editor privilege can unlock accounts from the Users page.
- For admin accounts, lockout is temporary and auto-unlocks after a set duration (configurable in Service Settings).
⚙️ Lockout Settings
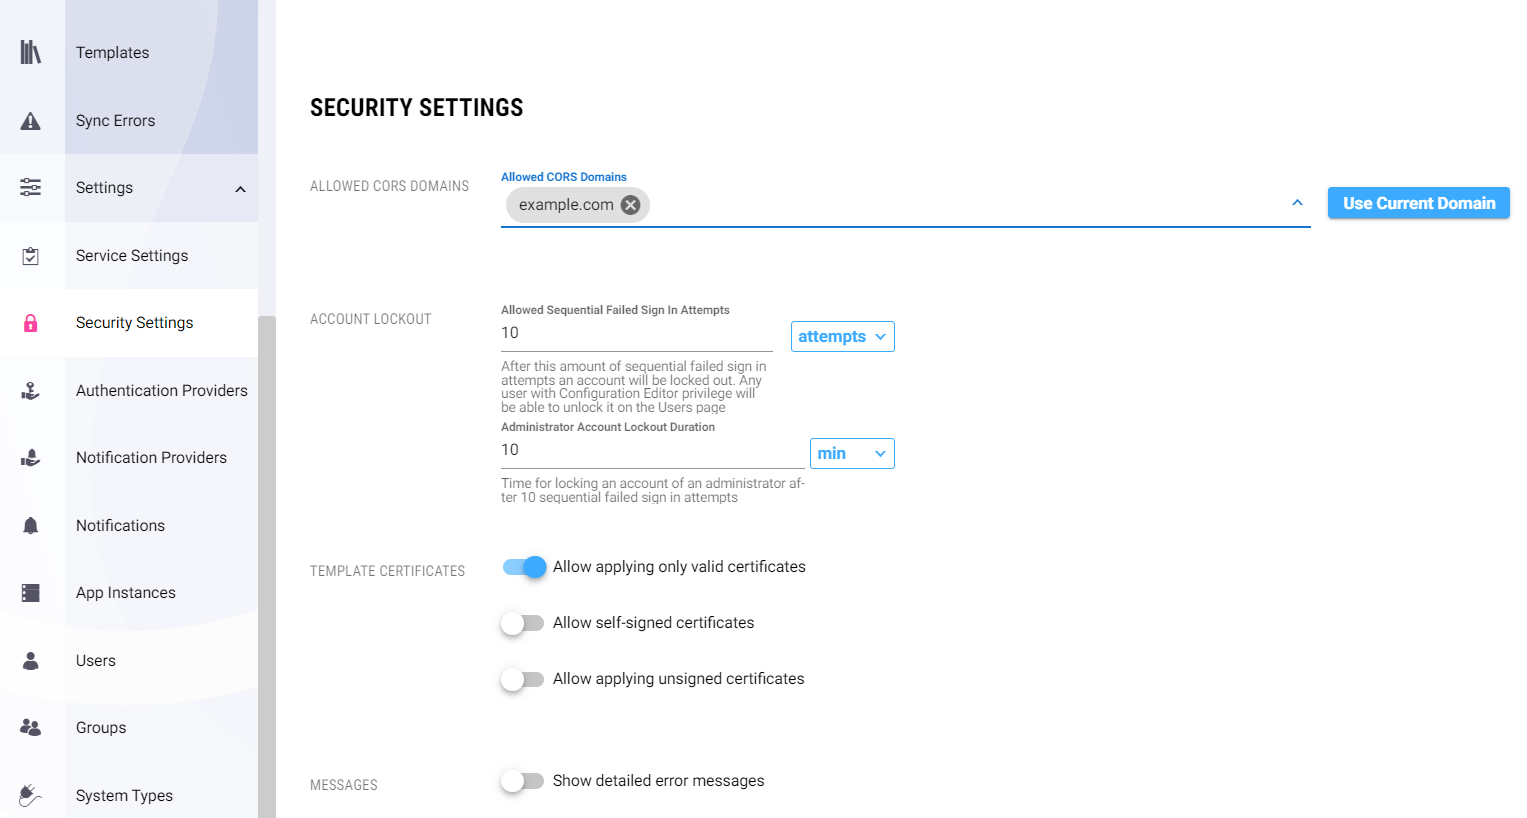
Configure lockout settings for security and usability:
-
Set Allowed Failed Attempts
- Go to Service Settings.
- Set the maximum failed sign-in attempts.
- Save changes.
-
Set Admin Lockout Duration
- In Service Settings, set the lockout duration for admin accounts.
- Save changes.
👥 Adding a Group to a User
Assign users to groups for effective permission management:
- Go to the Users page.
- Click Edit next to the user.
- Select groups from the available list.
- Click Save to update group memberships.
🔐 Personal Access Tokens (PAT)
Personal Access Tokens are self-service credentials that authenticate API and MCP requests on behalf of a user — without using a password. Each user manages their own tokens independently from their Profile → Access Tokens tab. Administrators cannot create or view tokens on behalf of other users.
For full details see the Security Overview — Personal Access Tokens page.
What Are Personal Access Tokens?
- Named tokens: Each token has a user-given label (e.g. VS Code, CI Pipeline) so you can identify and revoke individual ones without disrupting others.
- Optional expiry: Set a specific expiry date and time, or leave blank for a token that never expires.
- Primary token: One token per user is designated primary — it supplies the HMAC secret used by webhook integrations (GitHub, GitLab, Zendesk, etc.).
- Multiple tokens: Create as many tokens as you need for different tools or environments.
Creating a Personal Access Token
- Click your avatar in the top-right corner and go to Profile.
- Open the Access Tokens tab.
- Click + New Token.
- Enter a descriptive name and an optional expiry date and time.
- Click Create Token — the token is displayed once only. Copy it immediately and store it securely.
Token format: syncnow_mcp_<32-character-hex>
Using a Token
Use the token as a Bearer credential in the Authorization header of any API or MCP request:
Authorization: Bearer syncnow_mcp_<your-token>
Tokens authenticate on all /api/* and /mcp/* endpoints.
Managing Tokens
| Action | Who | Notes |
|---|---|---|
| Create | Token owner | From Profile → Access Tokens |
| Revoke | Token owner | Non-primary tokens only; promote another to primary first |
| Set Primary | Token owner | Atomically swaps the primary designation |
| View history | Token owner | Switch to the All filter to see expired and revoked tokens |
📝 Example: Authenticating a Webhook with a PAT
-
Create a token
In your Profile → Access Tokens, create a token named Webhook with no expiry. Copy the token value immediately. -
Set it as primary (if webhook integration is required)
Click Set Primary on the token. The primary token's value is used as the HMAC signing secret by SyncNow connector webhook subscriptions. -
Configure your webhook source
Pass the token in theAuthorizationheader of incoming webhook requests:Authorization: Bearer syncnow_mcp_<your-token> -
Rotate when needed
Create a new token, set it as primary, then revoke the old one. Webhook sources must be updated to use the new token value.
By following these procedures, administrators can effectively manage users and groups, while each user maintains full control over their own access tokens.